

It was a cold and misty day in October when I found myself in Yountville in Northern California. Motivated by a desperate need to "get the hell out of Los Angeles" (it happens, often) and single, I was hungry after a rather lackluster tasting at Cakebread Winery. Being a fan of Thomas Keller - by collected legend more so than experience - I knew of Bouchon, French Laundry and Ad Hoc - but had never experienced the lore.
I walked into Bouchon and looked at menu. After dining at Bistro Jeanty the night before, I wasn't that much in the mood for another turn at French cuisine. Plus, I felt very single in a room of couples and just wasn't feeling it.
I continued down the road to Ad Hoc, Keller's more casual and American bistro style restaurant. Immediately, I felt that this was it. Did they have a reservation available? Why yes, they did. I ate. I savored. I had an experience of oral pleasure, peacefulness and happiness that I had rarely experienced up to that point in my life.
 A few years later, I was inspired to pop into Williams-Sonoma for inspiration on what to cook then boyfriend and myself for dinner. I saw the Ad Hoc Fried Chicken Kit. Memories of my adventures in Yountville came rushing back to me. I was sold!
Excited, I opened the exquisitely designed packet and visually discovered the contents. They were small. But great things come in small packages, right? Resolute, I was determined to experience the same thrill I had sitting as a singleton, now with a partner who enjoyed food as well.
Over the course of the weekend, I followed the directions. Brine the first night (clearly, my vision of a night's dinner was shot) and fry the next night.
In his hot and slightly cramped kitchen, I realized the following:
- The suggested packet of spices did not cover the amount of chicken suggested in the recipe. We used one diced up, bone in, whole chicken. No bueno.
- The brine was forgettable and really didn't saturate said chicken, using said amount, in a manner that made the almost to $20 for it worth it.
- I hate cooking dinner and then being forced to watch the Food Network. To this day, I rarely turn on the Food Network without changing it to DIY or House Hunters International on HGTV within a few seconds.
- I can do better - in the relationship and in making this chicken.

The secret? It's the brine. Salt is a flavor enhancer. This is assuming that you've stepped away from your iodized salt training pants and have your nice Kosher salt or sea salt dress slacks on. The salt penetrates the meat and allows for the additional flavors of the lemon, basil and more to create a moist, flavor filled piece of meat.
Another tip? I don't use bone in meat. I use boneless, skinless frozen breasts from Costco and cut the pieces up to my desired size prior to frying.
I've also noticed that I get a crispier crust by frying in my cast iron skillets than my deep fryer.
I'm warning you now - Once you start cooking, it's going to be hard to not eat it. You will be inclined to leaving nothing to serve. Good things come to those who wait. I'm also going to warn you that I have made fried chicken and waffles that are better from anything Roscoe's Chicken and Waffles could ever produce with this recipe. Yes. It's that good.
This is assuming that you already have your chicken or chicken breast. If you're doing the whole recipe, the recipe suggests using two 2 1/2- to 3-pound chickens.
Buttermilk Fried Chicken
adapted from Ad Hoc at Home| Brine for Two Gallons |  | |
| 5 | lemons, halved | |
| 24 | bay leaves | |
| 4 ounces | flat leaf parsley | |
| 1 ounce | thyme | |
| 1/2 cup | clover honey | |
| 1 head | garlic, halved through the equator | |
| 3/4 cup | whole black peppercorns | |
| 2 cups | kosher salt | |
| 2 gallons | water | |
Note: I usually half this recipe, boil, let slightly cool and then scoop with a ladle into washed glass jars. I then screw the tops on and place the individual brine filled delights into my freezer. This allows me to only use the brine I need at any given time. Plus, the brine keeps much longer while frozen. Since I'm using the individually frozen chicken breasts, this works better for me.
For Dredging and Frying:
| 1 quart | buttermilk |
| |
| Flour Based Coating: | |
| 6 cups | all-purpose flour |
| 1/4 cup | garlic powder |
| 1/4 cup | onion powder |
| 1 tablespoon plus 1 teaspoon | paprika |
| 1 tablespoon plus 1 teaspoon | cayenne |
| 1 tablespoon plus 1 teaspoon | kosher salt |
| 1 tsp | freshly ground black pepper |
| |
Directions:
Cut each chicken into 10 pieces: 2 legs, 2 thighs, 4 breast quarters, and 2 wings. Pour the brine into a container large enough to hold the chicken pieces, add in the chicken, and refrigerate for 12 hours (no longer, or the chicken may become too salty).
Remove the chicken from the brine (discard the brine) and rinse under cold water, removing any herbs or spices sticking to the skin. Pat dry with paper towels, or let air-dry. Let rest at room temperature for 1-1/2 hours, or until it comes to room temperature.
If you have two large pots (about 6 inches deep) and a lot of oil, you can cook the dark and white meat at the same time; if not, cook the dark meat first, then turn up the heat and cook the white meat. No matter what size pot you have, the oil should not come more than one-third of the way up the sides of the pot. Fill the pot with at least 2 inches of peanut oil and heat to 320°F. Set a cooling rack over a baking sheet. Line a second baking sheet with parchment paper.
Meanwhile, combine all the coating ingredients in a large bowl. Transfer half the coating to a second large bowl. Pour the buttermilk into a third bowl and season with salt and pepper. Set up a dipping station: the chicken pieces, one bowl of coating, the bowl of buttermilk, the second bowl of coating, and the parchment-lined baking sheet.
Just before frying, dip the chicken thighs into the first bowl of coating, turning to coat and patting off the excess; dip them into the buttermilk, allowing the excess to run back into the bowl; then dip them into the second bowl of coating. Transfer to the parchment-lined pan.
Carefully lower the thighs into the hot oil. Adjust the heat as necessary to return the oil to the proper temperature. Fry for 2 minutes, then carefully move the chicken pieces around in the oil and continue to fry, monitoring the oil temperature and turning the pieces as necessary for even cooking, for 11 to 12 minutes, until the chicken is a deep golden brown, cooked through, and very crisp. Meanwhile, coat the chicken drumsticks and transfer to the parchment-lined baking sheet.
Transfer the cooked thighs to the cooling rack skin-side-up and let rest while you fry the remaining chicken. (Putting the pieces skin-side-up will allow excess fat to drain, whereas leaving them skin-side-down could trap some of the fat.) Make sure that the oil is at the correct temperature, and cook the chicken drumsticks. When the drumsticks are done, lean them meat-side-up against the thighs to drain, then sprinkle the chicken with fine sea salt.
Turn up the heat and heat the oil to 340°F. Meanwhile, coat the chicken breasts and wings. Carefully lower the chicken breasts into the hot oil and fry for 7 minutes, or until golden brown, cooked through, and crisp. Transfer to the rack, sprinkle with salt, and turn skin side up. Cook the wings for 6 minutes, or until golden brown and cooked through. Transfer the wings to the rack and turn off the heat.
Note: Let the chicken rest for 7 to 10 minutes after it comes out of the fryer so that it has a chance to cool down. If the chicken has rested for longer than 10 minutes, put the tray of chicken in a 400°F oven for a minute or two to ensure that the crust is crisp and the chicken is hot.
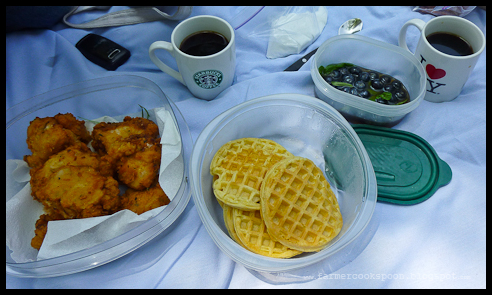
Mmm.. chicken so good that it inspires a chicken and waffles brunch picnic in the park!
No comments:
Post a Comment